dimanche 23 septembre 2012

Create an application to make Insert , update , Delete and retrieve operation on the database


File Name : E18Activity.java


package bsr.exa;
import java.util.Locale;
import android.app.Activity;
import android.content.Intent;
import android.database.sqlite.SQLiteDatabase;
import android.os.Bundle;
import android.view.Menu;
import android.view.MenuItem;
import android.view.View;
import android.view.View.OnClickListener;
import android.widget.Button;
import android.widget.EditText;
import android.widget.Toast;

public class E18Activity extends Activity {
/**
* @author Bipin S Rupadiya , www.gtu-android.blogspot.com
*
* 18) Create an application to make Insert , update , Delete and retrieve operation on the database.
*
*
* */
SQLiteDatabase db;
@Override
public void onCreate(Bundle savedInstanceState) {
super.onCreate(savedInstanceState);
setContentView(R.layout.main);
createDB();
//do insert
Button btnInsert=(Button)findViewById(R.id.btnInsert );
btnInsert.setOnClickListener(new OnClickListener() {

public void onClick(View arg0) {

insert();
}
});
Button btnClear=(Button)findViewById(R.id.btnClear );
btnClear.setOnClickListener(new OnClickListener() {
public void onClick(View arg0) {
clear();
}
});
}
@Override
public boolean onCreateOptionsMenu(Menu menu) {
super.onCreateOptionsMenu(menu);
CreateMenu(menu);
return true;
}
@Override
public boolean onOptionsItemSelected(MenuItem item)
{
return MenuChoice(item);
}

private void CreateMenu(Menu menu)
{
MenuItem mnu1 = menu.add(0, 0, 0, "Insert");
{
mnu1.setAlphabeticShortcut('i');
mnu1.setIcon(android.R.drawable.ic_input_add);
}
MenuItem mnu2 = menu.add(0, 1, 1, "Search");
{
mnu2.setAlphabeticShortcut('s');
mnu2.setIcon(android.R.drawable.ic_search_category_default);

}
MenuItem mnu3 = menu.add(0, 2, 2, "Delete");
{
mnu3.setAlphabeticShortcut('d');
mnu3.setIcon(android.R.drawable.ic_delete);

}
MenuItem mnu4 = menu.add(0, 3, 3, "View");
{
mnu4.setAlphabeticShortcut('d');
mnu4.setIcon(android.R.drawable.ic_menu_info_details);
}
}
private boolean MenuChoice(MenuItem item)
{
Intent intent=new Intent();
switch (item.getItemId()) {
case 0:
insert();
return true;
case 1:
intent.setClass(E18Activity.this, Search.class);
startActivity(intent);
return true;
case 2:
intent.setClass(E18Activity.this, Search.class);
startActivity(intent);
return true;

case 3:
intent.setClass(E18Activity.this, ViewRecord.class);
startActivity(intent);
return true;

}
return false;
}
public void createDB()
{
db=openOrCreateDatabase("Student.db", SQLiteDatabase.CREATE_IF_NECESSARY, null);
db.setLocale(Locale.getDefault());
db.setLockingEnabled(true);
db.setVersion(1);
String sql="create table if not exists Stud(id INTEGER PRIMARY KEY AUTOINCREMENT, name TEXT, age INTEGER)";
db.execSQL(sql);
}
public void insert()
{
EditText txtName=(EditText)findViewById(R.id.txtName);
EditText txtAge=(EditText)findViewById(R.id.txtAge);
if(txtName.getText().toString().equals(""))
{
Toast.makeText(E18Activity.this, "Enter Name.", Toast.LENGTH_SHORT).show();
}
else if (txtAge.getText().toString().equals(""))
{
Toast.makeText(E18Activity.this, "Enter Age.", Toast.LENGTH_SHORT).show();
}
else
{

String sql="insert into Stud(name,age) values('"+ txtName.getText().toString() +"',"+txtAge.getText().toString()+")";
db.execSQL(sql);
clear();
Toast.makeText(E18Activity.this, "Record Successfully Inserted.", Toast.LENGTH_SHORT).show();
}
}
public void clear()
{
EditText txtName=(EditText)findViewById(R.id.txtName);
EditText txtAge=(EditText)findViewById(R.id.txtAge);
txtName.setText("");
txtAge.setText("");

txtName.clearFocus();
txtAge.clearFocus();
txtName.requestFocus();


}
@Override
public void onDestroy()
{
super.onDestroy();
db.close();
}
}

File Name : Search.java


package bsr.exa;

import android.app.Activity;
import android.app.AlertDialog;
import android.content.DialogInterface;
import android.database.Cursor;
import android.database.sqlite.SQLiteDatabase;
import android.os.Bundle;
import android.view.View;
import android.view.View.OnClickListener;
import android.widget.Button;
import android.widget.EditText;
import android.widget.RelativeLayout;
import android.widget.Toast;
/**
* @author Bipin S Rupadiya , www.gtu-android.blogspot.com
*
* 18) Create an application to make Insert , update , Delete and retrieve operation on the database.
*
*
* */
public class Search extends Activity {
SQLiteDatabase db;
EditText txtSearch;
EditText txtName;
EditText txtAge;
Button btnEdit;
Button btnDelete;
RelativeLayout rlRecord;
RelativeLayout rlSearch;
String recID="0";
@Override
public void onCreate(Bundle savedInstanceState) {
super.onCreate(savedInstanceState);

setContentView(R.layout.search);

db=openOrCreateDatabase("Student.db", SQLiteDatabase.CREATE_IF_NECESSARY, null);


txtName = (EditText)findViewById(R.id.txtName);
txtAge = (EditText)findViewById(R.id.txtAge);
txtSearch = (EditText)findViewById(R.id.txtSearch);
btnEdit=(Button)findViewById(R.id.btnEdit);
btnDelete=(Button)findViewById(R.id.btnDelete);

txtSearch.requestFocus();
txtName.setEnabled(false);
txtAge.setEnabled(false);
btnEdit.setEnabled(false);
btnDelete.setEnabled(false);

Button btnSearch=(Button)findViewById(R.id.btnSearch);
btnSearch.setOnClickListener(new OnClickListener() {
public void onClick(View arg0) {
if (txtSearch.getText().toString().equals(""))
{
Toast.makeText(Search.this, "Enter value.", Toast.LENGTH_SHORT).show();
}
else
{
searchRecord();
}
}
});
//---------------Edit/update---------------------------------
final Button btnEdit=(Button)findViewById(R.id.btnEdit);
btnEdit.setOnClickListener(new OnClickListener() {
public void onClick(View arg0) {

if (btnEdit.getText().toString().equals("Edit"))
{
btnEdit.setText("Update");
txtName.setEnabled(true);
txtAge.setEnabled(true);

txtName.requestFocus();

btnDelete.setEnabled(false);

}
else
{
txtName.setEnabled(false);
txtAge.setEnabled(false);

btnDelete.setEnabled(true);

btnEdit.setText("Edit");
String sql="update Stud set name='"+txtName.getText().toString()+"', age="+txtAge.getText().toString()+" where id="+recID;
db.execSQL(sql);
Toast.makeText(Search.this, " Record Updated Successfully" , Toast.LENGTH_LONG).show();
}
}
});
//------------------------Delete ---------------------------

btnDelete.setOnClickListener(new OnClickListener() {

public void onClick(View arg0)
{
// TODO Auto-generated method stub
AlertDialog.Builder alertbox = new AlertDialog.Builder(arg0.getContext());
alertbox.setIcon(android.R.drawable.ic_dialog_alert);
alertbox.setTitle("Confirm");
alertbox.setMessage("Are You Sure? You want to delete this record");
alertbox.setPositiveButton("Delete", new DialogInterface.OnClickListener()
{
public void onClick(DialogInterface arg0, int arg1)
{
// TODO Auto-generated method stub
String sql="Delete from Stud where id="+recID;
db.execSQL(sql);
Toast.makeText(getApplicationContext(), "Record Deleted", Toast.LENGTH_LONG).show();
//clear old search result
txtSearch.setText("");
txtName.setText("");
txtAge.setText("");
txtSearch.requestFocus();
}
});
alertbox.setNegativeButton(" Cancel ", new DialogInterface.OnClickListener()
{
public void onClick(DialogInterface arg0, int arg1)
{
// TODO Auto-generated method stub

}
});
alertbox.show();
}
});
}
public void searchRecord()
{
try
{
txtSearch = (EditText)findViewById(R.id.txtSearch);
txtName = (EditText)findViewById(R.id.txtName);
txtAge = (EditText)findViewById(R.id.txtAge);
//Cursor c=db.rawQuery("select id,name,age from Stud where id="+ txtSearch.getText().toString(), null);
Cursor c=db.rawQuery("select id,name,age from Stud where id=?", new String[]{txtSearch.getText().toString()});

if(c.getCount()>0)
{
c.moveToNext();
recID= c.getString(0);
txtName.setText( c.getString(1));
txtAge.setText(c.getString(2));
btnEdit.setEnabled(true);
btnDelete.setEnabled(true);
}
else
{
Toast.makeText(this, "No Record Found" , Toast.LENGTH_LONG).show();
}
}
catch(Exception e)
{
Toast.makeText(this, ""+e, Toast.LENGTH_LONG).show();
}
}
public void onDestroy()
{
super.onDestroy();
db.close();
}
}


File Name : ViewRecord.java

package bsr.exa;
/**
* @author Bipin S Rupadiya , www.gtu-android.blogspot.com
*
* 18) Create an application to make Insert , update , Delete and retrieve operation on the database.
*
*
* */
import java.util.ArrayList;

import android.app.ListActivity;
import android.database.Cursor;
import android.database.sqlite.SQLiteDatabase;
import android.os.Bundle;
import android.widget.ArrayAdapter;
import android.widget.Toast;
public class ViewRecord extends ListActivity {
SQLiteDatabase db;
@Override
public void onCreate(Bundle savedInstanceState) {
super.onCreate(savedInstanceState);
try
{
db=openOrCreateDatabase("Student.db", SQLiteDatabase.CREATE_IF_NECESSARY, null);
Cursor c=db.rawQuery("select id,name,age from Stud", null);
ArrayList<String> list = new ArrayList<String>();

int count=c.getCount();

if(c.getCount()>0)
{
while(c.moveToNext())
{
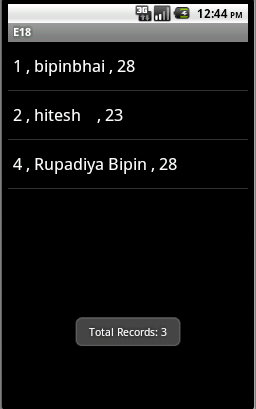
list.add(c.getString(0)+" , "+c.getString(1)+" , "+c.getString(2));
}
c.close();
Toast.makeText(this,"Total Records: "+count, Toast.LENGTH_LONG).show();
ArrayAdapter<String> adapter=new ArrayAdapter<String>(this,android.R.layout.simple_list_item_1, list);
getListView().setAdapter(adapter);
}
else
{
Toast.makeText(this, "No Record Found" , Toast.LENGTH_LONG).show();
}
}
catch(Exception e)
{
Toast.makeText(this, ""+e, Toast.LENGTH_LONG).show();
}
}
public void onDestroy()
{
super.onDestroy();
db.close();
}
}


Layout 1 : main.xml


<?xml version="1.0" encoding="utf-8"?>
<LinearLayout xmlns:android="http://schemas.android.com/apk/res/android"
android:orientation="vertical"
android:layout_width="fill_parent"
android:layout_height="fill_parent"
android:id="@+id/LL">


<TextView
android:layout_width="fill_parent"
android:layout_height="wrap_content"
android:text="@string/hello"
/>


<RelativeLayout android:layout_width="match_parent"android:id="@+id/relativeLayout1" android:layout_height="match_parent">


<TextView android:layout_width="wrap_content" android:id="@+id/textView1"android:textAppearance="?android:attr/textAppearanceLarge"android:layout_height="wrap_content" android:layout_alignParentTop="true"android:layout_alignParentLeft="true" android:text="Name:"></TextView>


<EditText android:inputType="textPersonName"android:layout_height="wrap_content" android:layout_below="@+id/textView1"android:layout_alignParentLeft="true" android:layout_width="match_parent"android:id="@+id/txtName">
<requestFocus></requestFocus>
</EditText>


<TextView android:layout_width="wrap_content" android:id="@+id/textView2"android:textAppearance="?android:attr/textAppearanceLarge"android:layout_height="wrap_content" android:layout_below="@+id/txtName"android:layout_alignParentLeft="true" android:layout_marginTop="24dp"android:text="Age:"></TextView>


<EditText android:inputType="phone" android:layout_height="wrap_content"android:layout_below="@+id/textView2" android:layout_alignParentLeft="true"android:layout_width="match_parent" android:id="@+id/txtAge"></EditText>


<Button android:layout_width="wrap_content"android:layout_height="wrap_content" android:layout_below="@+id/txtAge"android:layout_toRightOf="@+id/textView1" android:layout_marginTop="24dp"android:id="@+id/btnInsert" android:text="Insert"></Button>


<Button android:layout_width="wrap_content"android:layout_height="wrap_content"android:layout_alignBottom="@+id/btnInsert"android:layout_toRightOf="@+id/btnInsert" android:layout_marginLeft="26dp"android:id="@+id/btnClear" android:text="Clear"></Button>


</RelativeLayout>


</LinearLayout>


Layout 2 : search.xml


<?xml version="1.0" encoding="utf-8"?>
<LinearLayout xmlns:android="http://schemas.android.com/apk/res/android"
android:orientation="vertical"
android:layout_width="fill_parent"
android:layout_height="fill_parent"
android:id="@+id/LL" android:weightSum="1">


<TextView
android:layout_width="fill_parent"
android:layout_height="wrap_content"
android:text="@string/hello"
/>


<RelativeLayout android:layout_width="match_parent" android:gravity="left"android:layout_height="wrap_content" android:id="@+id/rlSearch">


<TextView android:layout_width="wrap_content" android:id="@+id/textView1"android:textAppearance="?android:attr/textAppearanceLarge"android:layout_height="wrap_content" android:layout_alignParentTop="true"android:layout_alignParentLeft="true" android:text="Search by ID :"></TextView>


<EditText android:inputType="textPersonName"android:layout_height="wrap_content" android:layout_below="@+id/textView1"android:id="@+id/txtSearch" android:layout_width="250dp"></EditText>


<Button android:layout_width="wrap_content" android:text="Search"android:id="@+id/btnSearch" android:layout_height="wrap_content"android:layout_alignTop="@+id/txtSearch"android:layout_toRightOf="@+id/txtSearch"></Button>


</RelativeLayout>


<RelativeLayout android:layout_height="312dp"android:gravity="center_vertical" android:layout_width="match_parent"android:layout_gravity="center_vertical" android:id="@+id/rlRecord">


<TextView android:layout_width="wrap_content" android:text="Name:"android:id="@+id/textView1" android:textAppearance="?android:attr/textAppearanceLarge" android:layout_alignParentLeft="true"android:layout_alignParentTop="true" android:layout_height="wrap_content"></TextView>


<EditText android:layout_width="match_parent" android:id="@+id/txtName"android:inputType="textPersonName" android:layout_below="@+id/textView1"android:layout_alignParentLeft="true" android:layout_height="wrap_content">
<requestFocus></requestFocus>
</EditText>


<EditText android:layout_width="match_parent" android:id="@+id/txtAge"android:inputType="phone" android:layout_below="@+id/textView2"android:layout_alignParentLeft="true" android:layout_height="wrap_content"></EditText>


<Button android:text="Delete" android:id="@+id/btnDelete"android:layout_height="wrap_content" android:layout_alignTop="@+id/btnEdit"android:layout_toRightOf="@+id/btnEdit" android:layout_width="160dp"></Button>


<Button android:layout_width="160dp" android:text="Edit"android:id="@+id/btnEdit" android:layout_height="wrap_content"android:layout_below="@+id/txtAge" android:layout_alignParentLeft="true"android:layout_marginTop="30dp"></Button>


<TextView android:layout_width="wrap_content" android:text="Age:"android:id="@+id/textView2" android:textAppearance="?android:attr/textAppearanceLarge" android:layout_height="wrap_content"android:layout_below="@+id/txtName" android:layout_alignParentLeft="true"android:layout_marginTop="14dp"></TextView>


</RelativeLayout>


</LinearLayout>

AndroidManifest.xml

<?xml version="1.0" encoding="utf-8"?>
<manifest xmlns:android="http://schemas.android.com/apk/res/android"
package="bsr.exa"
android:versionCode="1"
android:versionName="1.0">
<uses-sdk android:minSdkVersion="8" />


<application android:icon="@drawable/icon"android:label="@string/app_name">
<activity android:name=".E18Activity"
android:label="@string/app_name">
<intent-filter>
<action android:name="android.intent.action.MAIN" />
<category android:name="android.intent.category.LAUNCHER" />
</intent-filter>
</activity>
<activity android:name="ViewRecord"></activity>
<activity android:name="Search"></activity>


</application>
</manifest>

Download This Example 

jeudi 14 juin 2012

Apprendre à programmer une application nommé "GPS TRACKER" de A jusqu'a Z sur Android


Pour tous ceux qui souhaitent se lancer dans la programmation pour périphériques mobiles, Elephorm propose une formation Android. Ce tuto va vous apprendre rapidement et efficacement à programmer sur le système d’exploitation de Google, l’OS le plus répandue sur les mobiles.

Conçu pour fonctionner sur des périphériques mobiles (smartphones, tablettes tactiles) Android a été développé en grande partie par la communauté open source. Cet OS intègre tous les éléments nécessaires au bon fonctionnement des dernières technologies dont disposent les smartphones et tablettes tactiles.


À travers ce tuto application Android inédit, vous allez apprendre à travers un atelier pratique :


• Réaliser une application GPS Tracker


• Démarrer des activités grâce aux intents


• Utiliser les menus Android


• Publier une application sur Android Market


Ce tutoriel va également vous permettre d’acquérir tout un ensemble de connaissances qui vont vous permettre de vous initier à la programmation sur Android. Si vous avez fait le tour des applications disponibles sur le marché, créez la votre grâce à ce tuto et faites en profiter les autres.


télécharger Ici :


jeudi 29 mars 2012

Partager un texte sur Twitter, Facebook, etc. [Tutoriel Android n°23]


Nous allons voir dans ce tutorial, comment faire pour partager un texte, que l’on aura saisi dans un EditText, sur Twitter, Facebook ou toutes autres applications qui permettent le partage de message (c’est à dire par mail, sms, et toutes les applications du style Friend Stream, Peep, etc…)

Nous allons utiliser une interface graphique très simple, qui se compose d’un EditText et d’un bouton pour déclencher le partage. Voici donc le contenu du main.xml :
<?xml version="1.0" encoding="utf-8"?>
<LinearLayout xmlns:android="http://schemas.android.com/apk/res/android"
    android:orientation="vertical"
    android:layout_width="fill_parent"
    android:layout_height="fill_parent"
    >
<EditText  
    android:layout_width="fill_parent" 
    android:layout_height="wrap_content" 
    android:id="@+id/edittext"
    />
 
<Button
    android:layout_width="fill_parent" 
    android:layout_height="wrap_content" 
 android:id="@+id/share"
    android:text="Partager"
    />
</LinearLayout>
On déclare notre EditText et notre Button (pour une meilleur lisibilité dans le code) :
private EditText text;
private Button share;
On les relie avec l’interface graphique
text = (EditText)findViewById(R.id.edittext);
share = (Button)findViewById(R.id.share);
On créer un OnClickListener pour lancer l’action de partage lorsque le Button est appuyer.
share.setOnClickListener(
        new OnClickListener() {
  @Override
  public void onClick(View v) {
   final Intent MessIntent = new Intent(Intent.ACTION_SEND);
          MessIntent.setType("text/plain");
          MessIntent.putExtra(Intent.EXTRA_TEXT, text.getText().toString());
          VotreActivity.this.startActivity(Intent.createChooser(MessIntent, "Partager avec..."));
  }
        }
);


Examinons ce code:

>>> Création de l’Intent, MessIntent est le nom donner, à vous de choisir le votre =D
final Intent MessIntent = new Intent(Intent.ACTION_SEND);
>>> Définition du type d’Intent. J’en ai essayer d’autre mais lui seul permet d’utiliser toutes les applications disponibles.
MessIntent.setType("text/plain");
>>> Définition du texte (on récupère le texte de l’EditText) à publier sur Twitter, Facebook ou autres.
MessIntent.putExtra(Intent.EXTRA_TEXT, text.getText().toString());
>>> Lancement de l’Intent créer précédemment. MessIntent est l’Intent créer, et « Partager avec…. » correspond au titre de la boite de dialogue qui s’ouvrira pour vous proposer l’application à utiliser pour partager votre texte.
VotreActivity.this est le nom de votre activité en cours, qui est donc à remplacer par la votre).
VotreActivity.this.startActivity(Intent.createChooser(MessIntent, "Partager avec..."));
Vous savez désormais comment envoyer un message sur les réseaux sociaux ou autres. Je vous met deux petites screens pour que vous voyez ce que vous devriez obtenir :
 
Je partage en « bonus » une modification simple du code qui vous permettra d’ouvrir Gmail avec une adresse et un sujet pré-rempli.
final Intent emailIntent = new Intent(android.content.Intent.ACTION_SEND);
emailIntent.setType("plain/text");
emailIntent.putExtra(Intent.EXTRA_SUBJECT, "SujetDuMessage");
emailIntent.putExtra(android.content.Intent.EXTRA_EMAIL, new String[]{"VotreEmail@gmail.com"});
VotreActivity.this.startActivity(Intent.createChooser(emailIntent, "Email Envoyer..."));


Je pense qu’il n’est pas nécessaire d’expliquer ce code qui ressemble beaucoup au précédent néanmoins si vous avez des questions, n’hésitez pas. En tout cas pré-remplir un mail peut être utile pour avoir des retour sur vos application par les utilisateurs.

Cette article a été rédigé par TecKnologikS (merci à lui ). Pour le remercier, vous pouvez télécharger ses applications et surtout faire vos retours pour qu’il puisse les améliorer : Verbes Irréguliers Anglais,Des Coquins, Hasard.

Si vous avez besoin d’un retour sur vos applications n’hésitez pas à lui envoyer un mail pour lui demander : tecknologiksdev [at] gmail [point] com (remplacer [at] par @ et [point] par .)

samedi 7 janvier 2012

Android Dashboard Design Tutorial


Android dashboard screen is an important element in android apps which provides easy navigation to prior functionalities of app. In this tutorial i am going to discuss how to build a dashboard screen for your app.


Download Exemple

As a reference i am using some of the code from Google I/O app. In this article i am taking an example of facebook android dashboard screen and below is a screenshot of final output.


The main goal is to achieve dashboard screen layout and provide navigation to related screens on selecting appropriate icon on the dashboard.

So let’s start by creating simple project.
1. Create a new project by going to File ⇒ New Android Project. Fill all the details and name your activity as AndroidDashboardDesignActivity.
2. In this project i am separating dashboard screen into Action Bar(Header), Dashboard and Footer. Finally i will merge all layouts together.
3. Under res/values create a new xml file and name it as styles.xml
( Right Click on res/layout ⇒ New ⇒ Android XML File) and fill it with following code.

styles.xml


<resources>
    <style name="ActionBarCompat">
        <item name="android:layout_width">fill_parent</item>
        <item name="android:layout_height">50dp</item>
        <item name="android:orientation">horizontal</item>
        <item name="android:background">@drawable/actionbar_background</item>
    </style>
    <style name="DashboardButton">
        <item name="android:layout_gravity">center_vertical</item>
        <item name="android:layout_width">wrap_content</item>
        <item name="android:layout_height">wrap_content</item>
        <item name="android:gravity">center_horizontal</item>
        <item name="android:drawablePadding">2dp</item>
        <item name="android:textSize">16dp</item>
        <item name="android:textStyle">bold</item>
        <item name="android:textColor">#ff29549f</item>
        <item name="android:background">@null</item>
    </style>   
   <style name="FooterBar">
        <item name="android:layout_width">fill_parent</item>
        <item name="android:layout_height">40dp</item>
        <item name="android:orientation">horizontal</item>
        <item name="android:background">#dedede</item>
    </style>
</resources>


⇒ Designing Actionbar (Header)
Design two images for 1. Gradient background for action-bar background, 2. Logo of the application.


4. Create new xml file under res/layouts and name it as actionbar_layout.xml
( Right Click on res/layout ⇒ New ⇒ Android XML File) and type the following code.

actionbar_layout.xml
<LinearLayout xmlns:android="http://schemas.android.com/apk/res/android"
    style="@style/ActionBarCompat" >
    <ImageView
        android:layout_width="wrap_content"
        android:layout_height="fill_parent"
        android:clickable="false"
        android:paddingLeft="15dip"
        android:scaleType="center"
        android:src="@drawable/facebook_logo" />
</LinearLayout>


 Designing Dashboard
For dashboard design your icons using some graphic editor software (i used Photoshop to create icons). Design each icon for three stages Default StateHover state and Selected state. Create all icons with 90px height.


5. Create a new class under res/package. Right Click on src/package folder ⇒ New ⇒ Class and name it as DashboardLayout.java and fill it with following code.


DashboardLayout.java
package com.androidhive.dashboard;
/*
 * Copyright 2011 Google Inc.
 *
 * Licensed under the Apache License, Version 2.0 (the "License");
 * you may not use this file except in compliance with the License.
 * You may obtain a copy of the License at
 *
 *
 * Unless required by applicable law or agreed to in writing, software
 * distributed under the License is distributed on an "AS IS" BASIS,
 * WITHOUT WARRANTIES OR CONDITIONS OF ANY KIND, either express or implied.
 * See the License for the specific language governing permissions and
 * limitations under the License.
 */
import android.content.Context;
import android.util.AttributeSet;
import android.view.View;
import android.view.ViewGroup;
/**
 * Custom layout that arranges children in a grid-like manner, optimizing for even horizontal and
 * vertical whitespace.
 */
public class DashboardLayout extends ViewGroup {
    private static final int UNEVEN_GRID_PENALTY_MULTIPLIER = 10;
    private int mMaxChildWidth = 0;
    private int mMaxChildHeight = 0;
    public DashboardLayout(Context context) {
        super(context, null);
    }
    public DashboardLayout(Context context, AttributeSet attrs) {
        super(context, attrs, 0);
    }
    public DashboardLayout(Context context, AttributeSet attrs, int defStyle) {
        super(context, attrs, defStyle);
    }
    @Override
    protected void onMeasure(int widthMeasureSpec, int heightMeasureSpec) {
        mMaxChildWidth = 0;
        mMaxChildHeight = 0;
        // Measure once to find the maximum child size.
        int childWidthMeasureSpec = MeasureSpec.makeMeasureSpec(
                MeasureSpec.getSize(widthMeasureSpec), MeasureSpec.AT_MOST);
        int childHeightMeasureSpec = MeasureSpec.makeMeasureSpec(
                MeasureSpec.getSize(widthMeasureSpec), MeasureSpec.AT_MOST);
        final int count = getChildCount();
        for (int i = 0; i < count; i++) {
            final View child = getChildAt(i);
            if (child.getVisibility() == GONE) {
                continue;
            }
            child.measure(childWidthMeasureSpec, childHeightMeasureSpec);
            mMaxChildWidth = Math.max(mMaxChildWidth, child.getMeasuredWidth());
            mMaxChildHeight = Math.max(mMaxChildHeight, child.getMeasuredHeight());
        }
        // Measure again for each child to be exactly the same size.
        childWidthMeasureSpec = MeasureSpec.makeMeasureSpec(
                mMaxChildWidth, MeasureSpec.EXACTLY);
        childHeightMeasureSpec = MeasureSpec.makeMeasureSpec(
                mMaxChildHeight, MeasureSpec.EXACTLY);
        for (int i = 0; i < count; i++) {
            final View child = getChildAt(i);
            if (child.getVisibility() == GONE) {
                continue;
            }
            child.measure(childWidthMeasureSpec, childHeightMeasureSpec);
        }
        setMeasuredDimension(
                resolveSize(mMaxChildWidth, widthMeasureSpec),
                resolveSize(mMaxChildHeight, heightMeasureSpec));
    }
    @Override
    protected void onLayout(boolean changed, int l, int t, int r, int b) {
        int width = r - l;
        int height = b - t;
        final int count = getChildCount();
        // Calculate the number of visible children.
        int visibleCount = 0;
        for (int i = 0; i < count; i++) {
            final View child = getChildAt(i);
            if (child.getVisibility() == GONE) {
                continue;
            }
            ++visibleCount;
        }
        if (visibleCount == 0) {
            return;
        }
        // Calculate what number of rows and columns will optimize for even horizontal and
        // vertical whitespace between items. Start with a 1 x N grid, then try 2 x N, and so on.
        int bestSpaceDifference = Integer.MAX_VALUE;
        int spaceDifference;
        // Horizontal and vertical space between items
        int hSpace = 0;
        int vSpace = 0;
        int cols = 1;
        int rows;
        while (true) {
            rows = (visibleCount - 1) / cols + 1;
            hSpace = ((width - mMaxChildWidth * cols) / (cols + 1));
            vSpace = ((height - mMaxChildHeight * rows) / (rows + 1));
            spaceDifference = Math.abs(vSpace - hSpace);
            if (rows * cols != visibleCount) {
                spaceDifference *= UNEVEN_GRID_PENALTY_MULTIPLIER;
            }
            if (spaceDifference < bestSpaceDifference) {
                // Found a better whitespace squareness/ratio
                bestSpaceDifference = spaceDifference;
                // If we found a better whitespace squareness and there's only 1 row, this is
                // the best we can do.
                if (rows == 1) {
                    break;
                }
            else {
                // This is a worse whitespace ratio, use the previous value of cols and exit.
                --cols;
                rows = (visibleCount - 1) / cols + 1;
                hSpace = ((width - mMaxChildWidth * cols) / (cols + 1));
                vSpace = ((height - mMaxChildHeight * rows) / (rows + 1));
                break;
            }
            ++cols;
        }
        // Lay out children based on calculated best-fit number of rows and cols.
        // If we chose a layout that has negative horizontal or vertical space, force it to zero.
        hSpace = Math.max(0, hSpace);
        vSpace = Math.max(0, vSpace);
        // Re-use width/height variables to be child width/height.
        width = (width - hSpace * (cols + 1)) / cols;
        height = (height - vSpace * (rows + 1)) / rows;
        int left, top;
        int col, row;
        int visibleIndex = 0;
        for (int i = 0; i < count; i++) {
            final View child = getChildAt(i);
            if (child.getVisibility() == GONE) {
                continue;
            }
            row = visibleIndex / cols;
            col = visibleIndex % cols;
            left = hSpace * (col + 1) + width * col;
            top = vSpace * (row + 1) + height * row;
            child.layout(left, top,
                    (hSpace == 0 && col == cols - 1) ? r : (left + width),
                    (vSpace == 0 && row == rows - 1) ? b : (top + height));
            ++visibleIndex;
        }
    }
}


6. Now we need to create a layout file dashboard screen. Create a new xml file under src/layouts and name it as fragment_layout.xml
( Right Click on res/layout ⇒ New ⇒ Android XML File)


fragment_layout.xml


<!-- Your package folder -->
<com.androidhive.dashboard.DashboardLayout
    android:layout_width="fill_parent"
    android:layout_height="fill_parent"
    android:layout_weight="1"
    android:background="#f8f9fe" >
    <!--  News Feed Button -->
    <Button
        android:id="@+id/btn_news_feed"
        style="@style/DashboardButton"
        android:drawableTop="@drawable/btn_newsfeed"
        android:text="News Feed" />
    <!--  Friends Button -->
    <Button
        android:id="@+id/btn_friends"
        style="@style/DashboardButton"
        android:drawableTop="@drawable/btn_friends"
        android:text="Friends" />
    <!--  Messages Button -->
    <Button
        android:id="@+id/btn_messages"
        style="@style/DashboardButton"
        android:drawableTop="@drawable/btn_messages"
        android:text="Messages" />
    <!--  Places Button -->
    <Button
        android:id="@+id/btn_places"
        style="@style/DashboardButton"
        android:drawableTop="@drawable/btn_places"
        android:text="Places" />
    <!--  Events Button -->
    <Button
        android:id="@+id/btn_events"
        style="@style/DashboardButton"
        android:drawableTop="@drawable/btn_events"
        android:text="Events" />
    <!--  Photos Button -->
    <Button
        android:id="@+id/btn_photos"
        style="@style/DashboardButton"
        android:drawableTop="@drawable/btn_photos"
        android:text="Photos" />
</com.androidhive.dashboard.DashboardLayout>

The output of above code will be


⇒ Designing Footer

7. Create a new xml file under res/layout and name it as footer_layout.xml and type the following code.

footer_layout.xml
<LinearLayout xmlns:android="http://schemas.android.com/apk/res/android"
    style="@style/FooterBar" >
    <TextView android:text="www.facebook.com"
            android:layout_width="fill_parent"
            android:layout_height="wrap_content"
            android:textColor="#606060"
            android:gravity="center"
            android:paddingTop="10dip"/>
</LinearLayout>


⇒ Merging all layout together

So far we designed Action bar, Dashboard and Footer. Finally we need to merge all layouts in one xml file.

8. Create a new xml file under src/layouts and name it as dashboard_layout.xml and type following code.
( Right Click on res/layout ⇒ New ⇒ Android XML File)

dashboard_layout.xml

<LinearLayout xmlns:android="http://schemas.android.com/apk/res/android"
    android:id="@+id/home_root"
    android:orientation="vertical"
    android:layout_width="fill_parent"
    android:layout_height="fill_parent">
        <!-- Include Action Bar -->
        <include layout="@layout/actionbar_layout"/>
        <!--  Include Fragmented dashboard -->
        <include layout="@layout/fragment_layout"/>   
        <!--  Include Footer -->
        <include layout="@layout/footer_layout"/>
</LinearLayout>


⇒ Switching between dashboard activities.

So far we created a static dashboard which has no functioning at all. So we need to add some functionality like launching separate activity for each icon on the dashboard. In this case i had 6 icons on my dashboard, so i need 6 Activities one for each icon. In my previous article How to switch between Activities in Android i explained switching between activites.


9. Open your main activity class file and paste following code.(AndroidDashboardDesignActivity.java)

AndroidDashboardDesignActivity.java
package com.androidhive.dashboard;
import android.app.Activity;
import android.content.Intent;
import android.os.Bundle;
import android.view.View;
import android.widget.Button;
import androidhive.dashboard.R;
public class AndroidDashboardDesignActivity extends Activity {
    @Override
    public void onCreate(Bundle savedInstanceState) {
        super.onCreate(savedInstanceState);
        setContentView(R.layout.dashboard_layout);
        /**
         * Creating all buttons instances
         * */
        // Dashboard News feed button
        Button btn_newsfeed = (Button) findViewById(R.id.btn_news_feed);
        // Dashboard Friends button
        Button btn_friends = (Button) findViewById(R.id.btn_friends);
        // Dashboard Messages button
        Button btn_messages = (Button) findViewById(R.id.btn_messages);
        // Dashboard Places button
        Button btn_places = (Button) findViewById(R.id.btn_places);
        // Dashboard Events button
        Button btn_events = (Button) findViewById(R.id.btn_events);
        // Dashboard Photos button
        Button btn_photos = (Button) findViewById(R.id.btn_photos);
        /**
         * Handling all button click events
         * */
        // Listening to News Feed button click
        btn_newsfeed.setOnClickListener(new View.OnClickListener() {
            @Override
            public void onClick(View view) {
                // Launching News Feed Screen
                Intent i = new Intent(getApplicationContext(), NewsFeedActivity.class);
                startActivity(i);
            }
        });
       // Listening Friends button click
        btn_friends.setOnClickListener(new View.OnClickListener() {
            @Override
            public void onClick(View view) {
                // Launching News Feed Screen
                Intent i = new Intent(getApplicationContext(), FriendsActivity.class);
                startActivity(i);
            }
        });
        // Listening Messages button click
        btn_messages.setOnClickListener(new View.OnClickListener() {
            @Override
            public void onClick(View view) {
                // Launching News Feed Screen
                Intent i = new Intent(getApplicationContext(), MessagesActivity.class);
                startActivity(i);
            }
        });
        // Listening to Places button click
        btn_places.setOnClickListener(new View.OnClickListener() {
            @Override
            public void onClick(View view) {
                // Launching News Feed Screen
                Intent i = new Intent(getApplicationContext(), PlacesActivity.class);
                startActivity(i);
            }
        });
        // Listening to Events button click
        btn_events.setOnClickListener(new View.OnClickListener() {
            @Override
            public void onClick(View view) {
                // Launching News Feed Screen
                Intent i = new Intent(getApplicationContext(), EventsActivity.class);
                startActivity(i);
            }
        });
        // Listening to Photos button click
        btn_photos.setOnClickListener(new View.OnClickListener() {
            @Override
            public void onClick(View view) {
                // Launching News Feed Screen
                Intent i = new Intent(getApplicationContext(), PhotosActivity.class);
                startActivity(i);
            }
        });
    }
}

10. Create a new class under res/package. Right Click on src/package folder ⇒ New ⇒ Class and name it as NewsFeedActivity.java and fill it with following code.
You also need to create
NewsFeedActivity.java
FriendsActivity.java
MessagesActivity.java
PlacesActivity.java
EventsActivity.java
PhotosActivity.java

NewsFeedActivity.java
package com.androidhive.dashboard;
import android.app.Activity;
import android.os.Bundle;
import androidhive.dashboard.R;
public class NewsFeedActivity extends Activity {
     /** Called when the activity is first created. */
    @Override
    public void onCreate(Bundle savedInstanceState) {
        super.onCreate(savedInstanceState);
        setContentView(R.layout.news_feed_layout);
    }
}

11. Also create a layout xml files for all your activities.
news_feed_layout.xml
friends_layout.xml
messages_layout.xml
places_layout.xml
events_layout.xml
photos_layout.xml

news_feed_layout.xml
<?xml version="1.0" encoding="utf-8"?>
<LinearLayout xmlns:android="http://schemas.android.com/apk/res/android"
    android:layout_width="match_parent"
    android:layout_height="match_parent"
    android:background="#f8f9fe"
    android:orientation="vertical" >
    <include layout="@layout/actionbar_layout" />
    <LinearLayout
        android:layout_width="fill_parent"
        android:layout_height="wrap_content" >
        <TextView
            android:layout_width="fill_parent"
            android:layout_height="wrap_content"
            android:padding="15dip"
            android:text="News Feed Screen"
            android:textColor="#ff29549f"
            android:textSize="25dip"
            android:textStyle="bold" />
    </LinearLayout>
</LinearLayout>

Adding Activity entries in AndroidManifest.xml
12. Dont’t forget to add an entry of all activities in your AndroidManifest.xml file. Open you AndroidManifest.xml file and modify the code as below

AndroidManifest.xml
<?xml version="1.0" encoding="utf-8"?>
    package="androidhive.dashboard"
    android:versionCode="1"
    android:versionName="1.0" >
    <uses-sdk android:minSdkVersion="8" />
    <application
        android:icon="@drawable/ic_launcher"
        android:label="@string/app_name" >
        <activity
            android:label="@string/app_name"
            android:name="com.androidhive.dashboard.AndroidDashboardDesignActivity" >
            <intent-filter >
                <action android:name="android.intent.action.MAIN" />
                <category android:name="android.intent.category.LAUNCHER" />
            </intent-filter>
        </activity>
        <!-- News Feed Activity -->
        <activity android:name="com.androidhive.dashboard.NewsFeedActivity" ></activity>
        <!-- Friends Activity -->
        <activity android:name="com.androidhive.dashboard.FriendsActivity" ></activity>
        <!-- Messages Activity -->
        <activity android:name="com.androidhive.dashboard.MessagesActivity" ></activity>
        <!-- Places Activity -->
        <activity android:name="com.androidhive.dashboard.PlacesActivity" ></activity>
        <!-- Events Activity -->
        <activity android:name="com.androidhive.dashboard.EventsActivity" ></activity>
        <!-- Photos Activity -->
        <activity android:name="com.androidhive.dashboard.PhotosActivity" ></activity>
    </application>
</manifest>

Run your project by right clicking on your project folder ⇒ Run As ⇒ 1 Android Application

Twitter Delicious Facebook Digg Stumbleupon Favorites More

 
Design by Free Android website | Bloggerized by wassim El mririe - Ramzi Essid | TO Best Web Host